Time to show off my favorites from Ally and Chase’s wedding as well as Ally’s bridals. Here we go!
This favorite is probably obvious:
Love love love this one. That look of contentment, like they forgot the cameras were even there, and are just enjoying this moment together. Quite possibly my very favorite!
The shot: My settings for this shot were ISO 200, 1/400 sec and f/3.2. I tend to shoot a little wide open as I love the blurred background. This was back in January, so the sky was slightly overcast, giving most of the photos more of a cooler tone. Sometimes I will warm up the white balance, but for this shot I embraced the cooler tone that was present that day. Which brings me to….
The Processing: Like everything else, I do most of my work in Lightroom. I worked with the Tone curve, adding a little more contrast, added a bit of a vignette, and kicked up the blacks (over 20, something I rarely do, but for this shot I knew it worked well). As stated before, I embraced the cooler tones for this shot, I actually pushed the blue/yellow white balance slider to around 3800-4000. You’ll also notice that there’s a yellow umbrella. The yellow in the RAW shot was just simply overpowering, even reflecting back onto their faces, so I lowered the Yellow Saturation and Luminance so that the umbrella didn’t upstage the gorgeous moment.
I also worked with this photo in Photoshop. I dodged and burned a little (to do this I open up a new layer, turn the blending mode to softlight, use the brush tool at 10% opacity and switch from black to white as needed. Black for darkening, white for lightening.) I burned in the area around their heads and lightened their faces just a bit. With dodging and burning like this, a little goes a looong way. I then added minor contrast changes with a levels layer and a curves layer. I sharpened by copying the background and made it a High Pass Layer set to 3.2, then set that layer to Softlight in Blending modes. I copied the background again and sharpened that layer with by using the Unsharp Mask tool, set to around 3.0 and 53% with the opacity set to 80%
Voila! Yeah, a I work a lot on that one.
Moving on….
I love this one because it obviously shows off a bit of Ally’s personality. Ally is the life of the party, not afraid to act silly, even on the temple steps, and I absolutely adore that about her.
The Shot: Same settings as before: ISO 200, f/3.2, 1/400 sec. That’s the nice thing about overcast days, ultra consistent!
The Processing: Lightroom again, bumped up the tone curve for contrast. I warmed up the white balance as it was too cold and had a greenish hue before. I actually made a preset called “Daylight – Prettify” to adjust things that are too blue and green to have a bit more magenta and yellow. Yellow/blue slider is at 5800, green/magenta is at +12. Bumped up the blacks to 12, and added some split toning, added some yellow to the highlights and some blue to the shadows to make a bit more artsy fun edit. I also cloned out someone else’s flash head in the lower left hand corner.
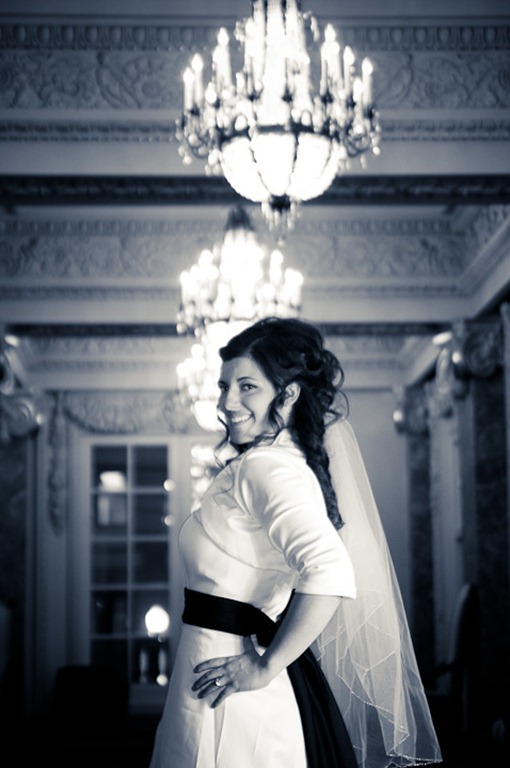
Now for her bridals!
Love how this shot came together, the expression, the composition, the lighting… Love it!
The Shot: (Don’t have my data right with me for this shot) but I believe these were the specs: ISO 400, 1/50 sec, f/3.2. I had an sb-600 camera right to wrap a bit around her. Power was at 1/4.
The processing: This is one of my more fun edits as well. I bumped up the blacks, added some vignette, and added conrast using the tone curve. I desaturated all the way, then added a split tone, just slightly there is tiny tiny bit of yellow in the highlights. Then for the shadows I added a blue and turned the saturation on that one all the way up. This will not work for all photos, but the ones it does work for, it looks beautiful.


